Tools Needed For
integrating driverpacks and Syspreping Windows XP :
Download them all. You
are going to need it. Disable your antivirus during the whole process.
1) sysprep sp3
3)
DriverPacks
(Don’t
download third party driverpacks. They may cause Problems)
Download only DriverPacks from ‘Windows
2000/XP/2003 (x86) DriverPacks’ section only. You will need a torrent client to
download driver packs. Download it from here.
Now, we will start.
Follow below steps :
1) Clean install windows XP on some system.
Install your software and do the customizations.
2) Extract DriverPacks Base into some folder and put all downloaded driverpacks in ‘DPBase\driverpacks’ folder.
3) Run DriverPacks Base (DPBase.exe) and choose ‘Stand
Alone Drivers’ as installation platform.
4) Click ‘>’ (next) button and choose only
CPU Driver Pack
5) Click next and choose method 1.
6) Now click slipstream.
7) Move the contents of thus created folder 'DriverPacks.net'
to the root of system drive of your computer.
8) Then unpack all remaining driver packs to the root of disc
C drive. They all will create a ‘D’ named folder in C drive and extracted in
that.
9) Extract DevPath.exe from ‘DPBase\bin\wnt5_x86-32\M2.7z’
zipped file and copy it into C Drive and in run box of start menu type ‘cmd’
and press enter. A command prompt will be opened and run below commands one by
one in command prompt.
cd\
DevPath.exe c:\D
10) Now in root of the system drive right click on dp_Inst_tool.cmd file and click edit and remove the line 'Echo DPsRootDel = "false" >> %DPFL%'.
11) Now Delete DPBase, DevPath.exe folders
and files because we don’t need them anymore.
12) Create a folder named ‘sysprep’ in the root of the C drive
and extract the contents of the zipped file ‘sysprep sp3.rar’ you downloaded
into it.
13) Create sysprep.inf file with setupmgr.exe (Located
in c:\sysprep folder) .
14) Right click on the sysprep.inf file and click edit. To the
[Unattended] section add the two lines as below.
UpdateInstalledDrivers=Yes
DriverSigningPolicy=Ignore
(Shown in Below Image)
15) Add a new section [GuiRunOnce] to sysprep.inf file.
16) Add a line ‘Command0=C:\DP_Install_Tool.cmd’ under
the [GuiRunOnce] section.
17) Add a new section [SysprepMassStorage] to sysprep.inf
file and save it.
18) Again Goto Start>Run, type ‘cmd’ and press enter.
19) In the opened command prompt type below commands.
cd c:\sysprep
sysprep.exe –bmsd
(as shown in below image)
This will take some time and add many lines to sysprep.inf file, so don’t panic.
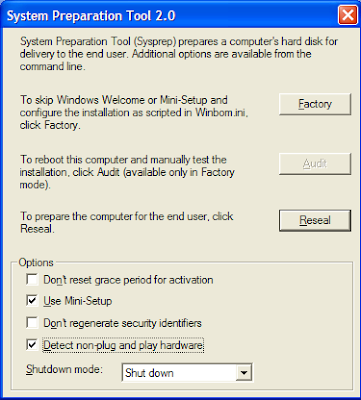
20) Now, launch sysprep.exe from c:\sysprep folder and check
'Use Mini-Setup' and 'Detect non-plug and play hardware' and hit 'Reseal'.


